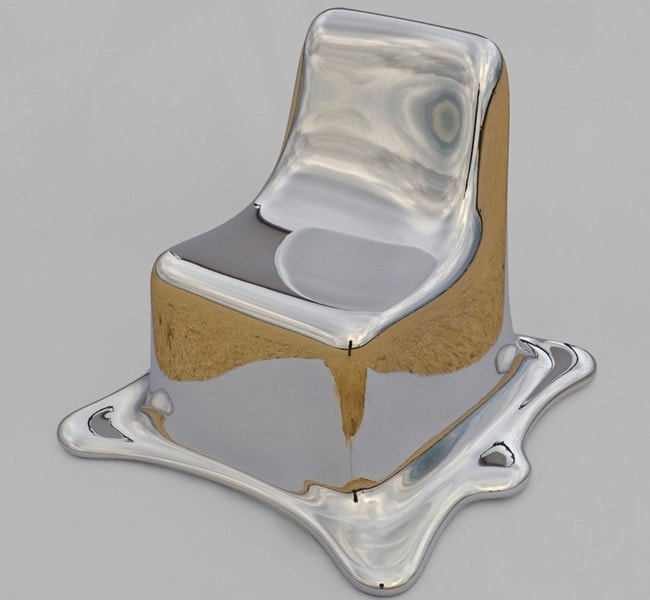
Dormeuse Design Process


Design Process
Dormeuse Design Process
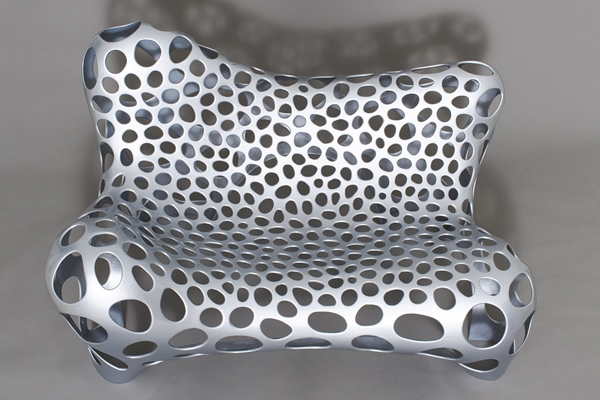
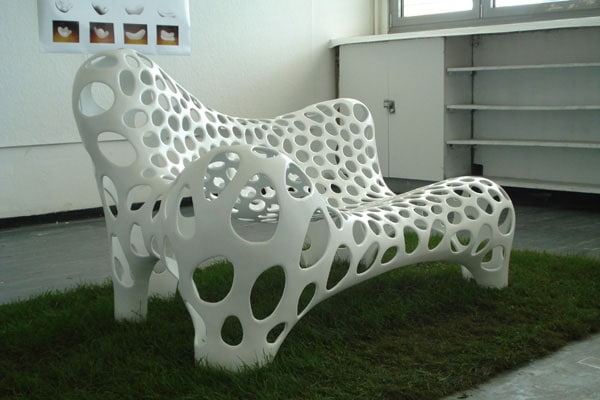
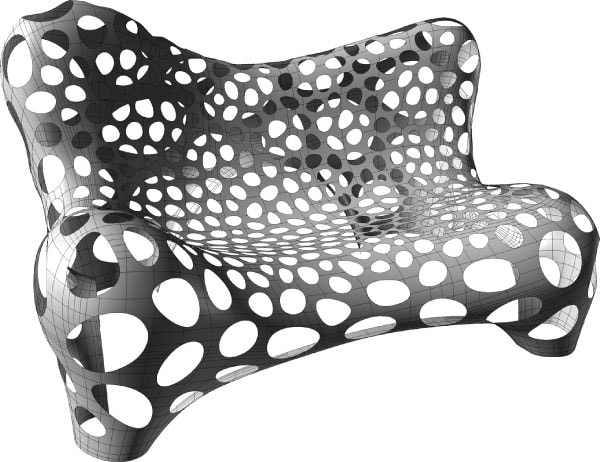
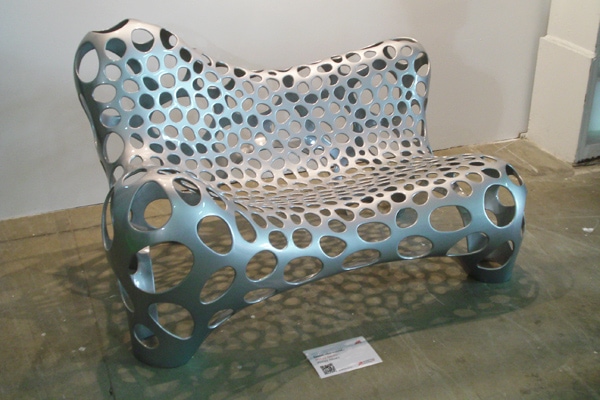
In the Dormeuse, Philipp Aduatz’ has created an object that combines a sculptural and opulent shape with a load bearing system of cell-like appearance. Due to its dynamic shape, intermediate positions between sitting and outright lying are comfortably possible.
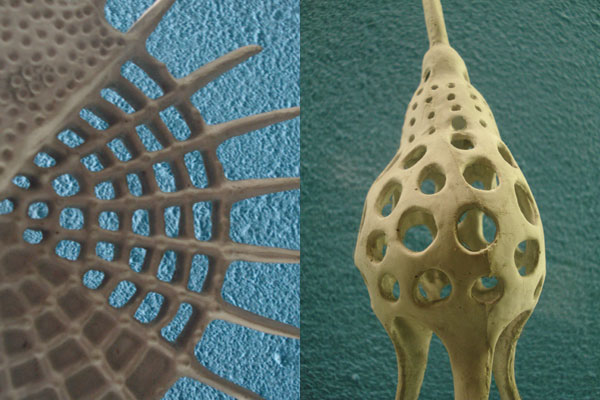
The Dormeuse was Aduatz’ diploma project at the University of Applied Arts Vienna in 2007. Through his involvement with the “culture of resting”, up from the Roman Empire, and his observations of people in various resting positions, the designer attempted to manifest his deliberations in an object. An important influence in Aduatz’ design was the work of the sculptor Anthony Cragg, who in his early work, created sculptures with natural looking cell-like structures. From him Aduatz got the inspiration to turn to nature for the load bearing system of his planned “reclining object”. Natural structures, such as bones, are ingeniously optimized load bearing systems which have a low density at a maximum load capacity. In several visits to the museum of natural history he studied the structure of fossils and ancient animal skeletons. This led Aduatz to design the intricate network of cell-like pockets and connecting filaments that make up the Dormeuse.
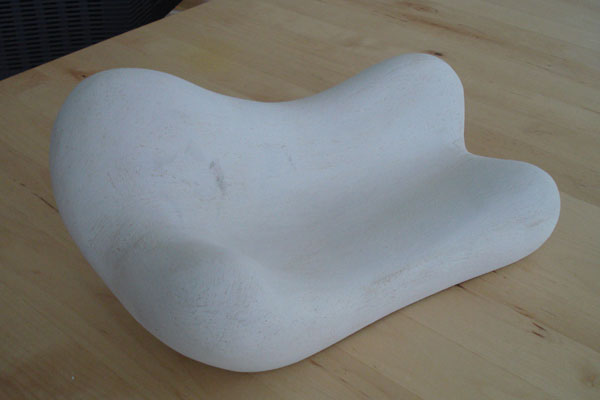
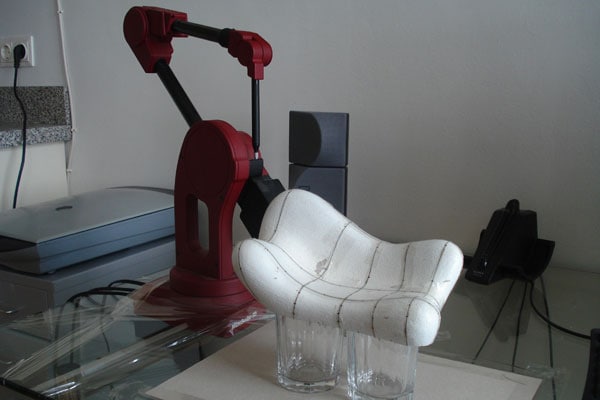
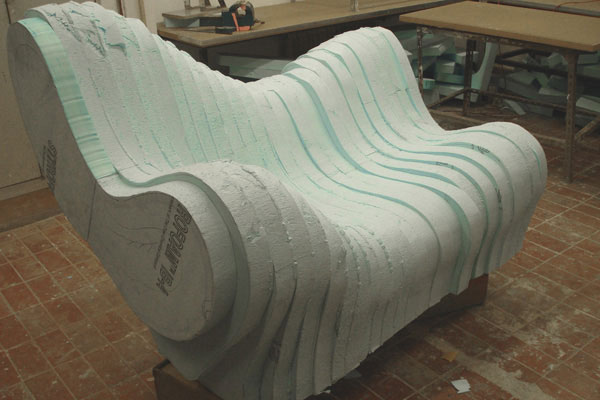
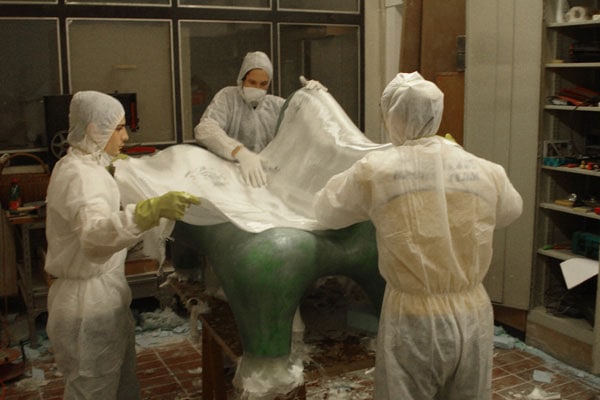
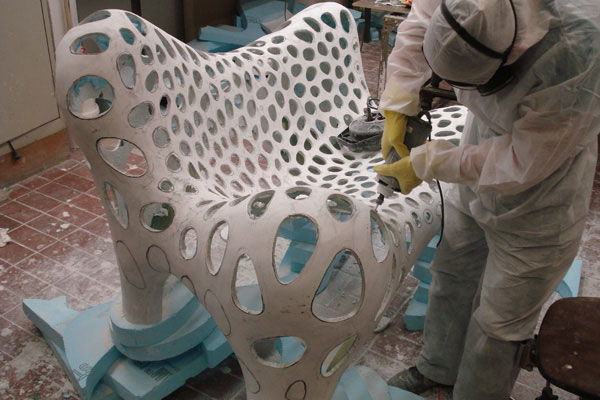
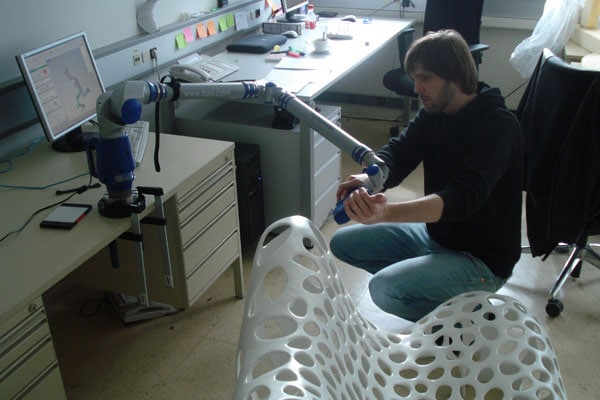
The design process started with a scaled-down clay model, which was digitized with a 3D scanner afterwards. This information was used to create the first life-size layer model. This 1:1 model was sculpted manually until it reached the desired shape. Then the polystyrene was covered with plaster and prepared for lamination. Approximately 20 layers of fiberglass were used in combination with epoxy resin to obtain a thickness of about 9mm. As the material for the final object a fiberglass reinforced polymer was selected. This material pushes the load capacity of the object to the limit and gives the object a maximum stiffness at a very low weight. The pockets were then drilled out and their edges were sanded by hand. The surface was sanded by hand as well in order to obtain the desired structural shape. At the end, the finished object was scanned in 3D again for series production.